> ## Documentation Index
> Fetch the complete documentation index at: https://www.traceloop.com/docs/llms.txt
> Use this file to discover all available pages before exploring further.
# Projects and Environments
> Organize your applications and deployment stages with Projects and Environments
Projects and Environments help you keep your LLM observability data organized and isolated across different applications, services, and deployment stages.
 ## Why Projects and Environments?
### The Problem
When you have multiple applications or deployment stages:
* Traces from different services get mixed together
* Production data appears alongside development experiments
* Team members see irrelevant data from other projects
* Testing changes risks affecting production monitoring
### The Solution
**Projects** completely isolate data for different applications:
* Each project has its own traces, datasets, prompts, evaluators, and experiments
* Switch between projects to view specific application data
* Generate separate API keys per project
**Environments** separate deployment stages within a project:
* dev, stg, and prd environments (built-in)
* Custom environments (e.g., "qa", "eu-prd", "preview")
* Each environment has its own API key and data stream
## Understanding Projects
### What is a Project?
A project is a complete isolation boundary for all your Traceloop data. Think of it as a workspace for a specific application or service.
**Each project contains:**
* Traces and spans
* Datasets for experiments
* Prompt configurations
* Evaluators and monitors
* Experiment results
**Common use cases for creating projects:**
* Separate applications (e.g., "web-app", "mobile-app", "api-service")
* Microservices in a distributed system
* Different teams or product areas
* Major feature branches or product lines
### When to Create a New Project
✅ **Create a new project when:**
* Building a new application or service
* Separating data for different teams
* Testing major architectural changes in isolation
* Managing multi-tenant applications (one project per tenant)
❌ **Don't create a new project for:**
* Different deployment stages (use environments instead)
* Temporary experiments (use Development environment)
* A/B tests (use datasets and experiments features)
## Understanding Environments
### What is an Environment?
An environment represents a deployment stage within a project. Each environment has its own API key, allowing you to send traces from different stages without mixing the data.
**Default environments** (cannot be deleted):
* **dev**: Local development and testing
* **stg**: Pre-production testing and validation
* **prd**: Live production traffic
**Custom environments**: Add your own based on your workflow
* Examples: "qa", "uat", "preview", "eu-prd", "us-prd"
### Organization-Level vs. Project-Level Environments
Traceloop supports two types of environments:
**Organization-Level Environments**
* Created at the organization settings level
* Automatically cascade to **all projects** (existing and new)
* Use this for environments that apply across your entire organization
**Project-Specific Environments**
* Created within a single project
* Only appear in that specific project
* Use this for project-specific deployment stages
**Best practice:** Create organization-level environments for company-wide deployment stages
(dev, stg, prd, qa). Create project-specific environments only when needed
for unique deployment scenarios.
### How Environment Cascading Works
When you create an organization-level environment:
1. It immediately appears in all existing projects
2. It automatically appears in any new projects you create
3. Each project can independently generate API keys for that environment
**Example:**
```
Organization creates "QA" environment
↓
Appears in "web-app" project (can generate its own QA API key)
Appears in "api-service" project (can generate its own QA API key)
Appears in "mobile-app" project (can generate its own QA API key)
```
## Setting Up Projects and Environments
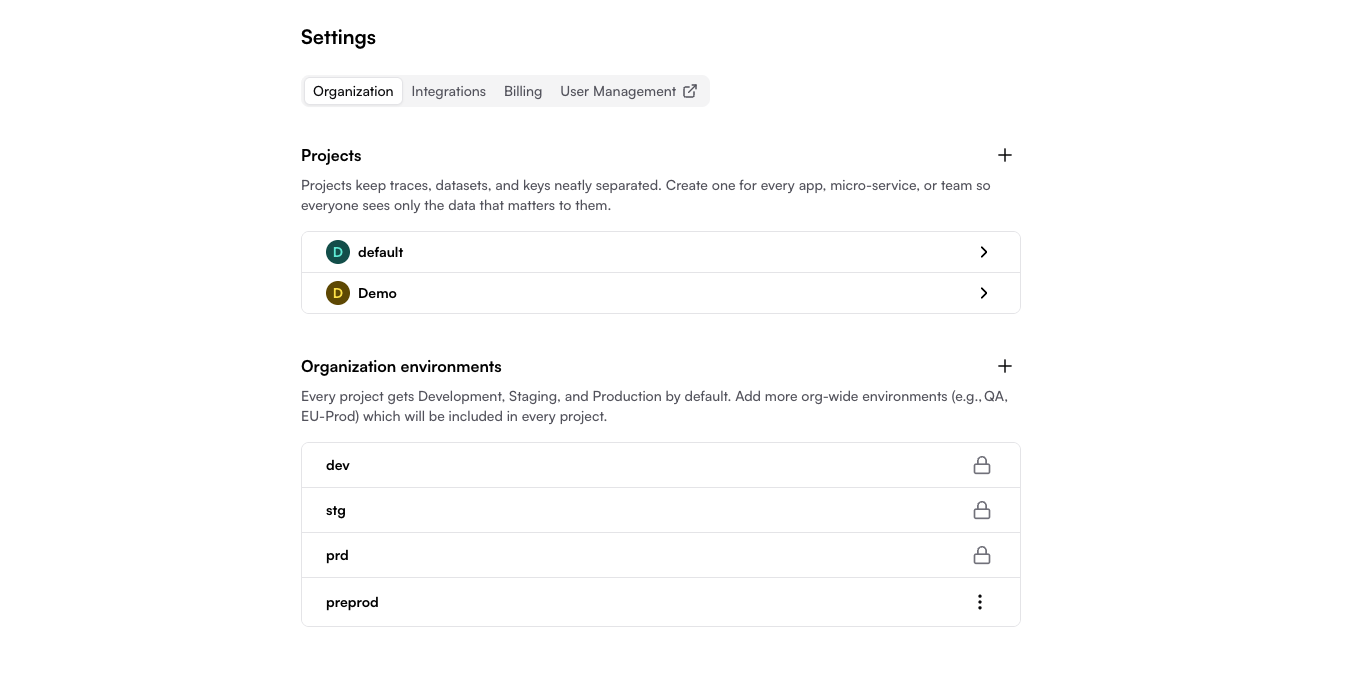
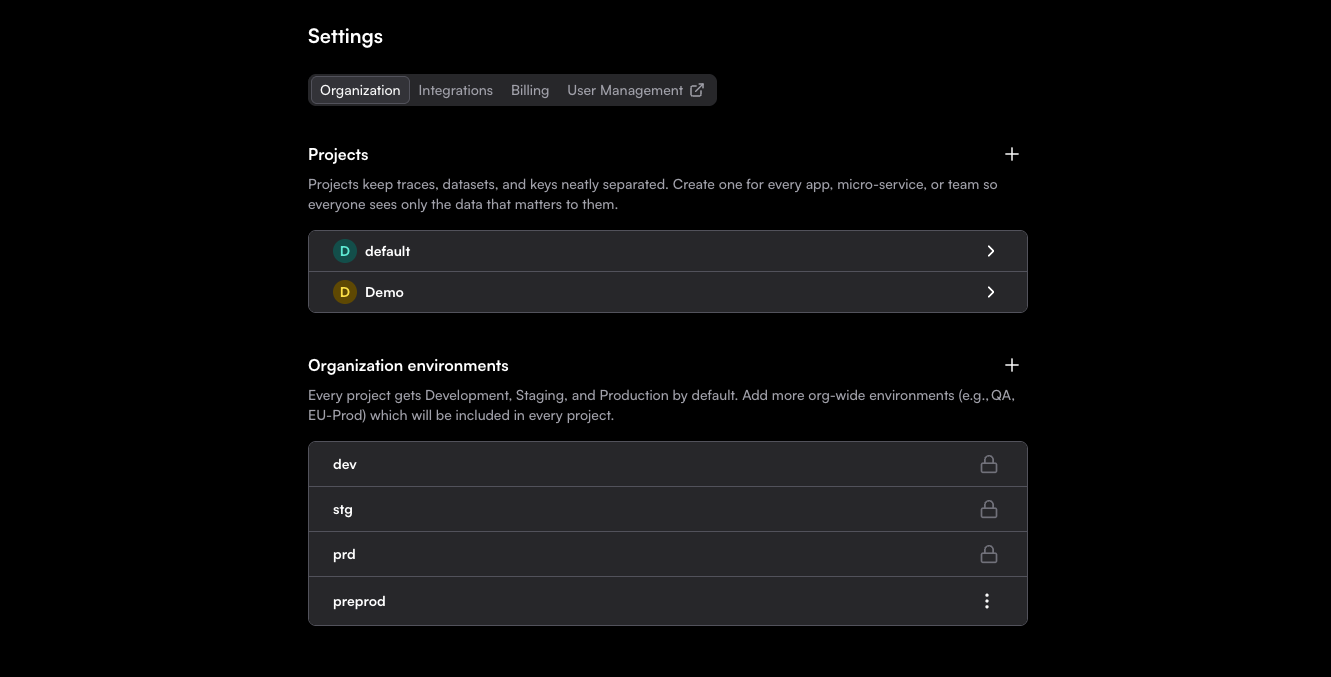
Go to **Settings** in your Traceloop dashboard, then select the **Organization** tab.
You'll see two sections:
* **Projects and API keys**: Manage your projects
* **Organization environments**: Manage org-wide environments
If you need a new project:
1. Click the **+** button next to "Projects and API keys"
2. Enter a descriptive name (e.g., "web-app", "payment-service", "mobile-app")
3. Click **Create**
The project is created instantly with all organization-level environments included.
A "Default project" is created automatically when you sign up.
You can rename or delete it if needed.
If you need additional environments beyond dev, stg, and prd:
**For organization-wide environments:**
1. Click the **+** button next to "Organization environments"
2. Enter an environment name (e.g., "qa", "preview", "eu-prd")
3. Click **Create**
4. The environment appears in all projects immediately
**For project-specific environments:**
1. Click on your project
2. Click the **+** button next to "Project environments"
3. Enter an environment name
4. Click **Create**
5. The environment appears only in this project
An environment **slug** is automatically created for SDK usage. For example,
"EU Production" becomes "eu-production" as the slug. The default environments
use "dev", "stg", and "prd" as their slugs.
API keys are generated per project + environment:
1. Click on your project
2. Find the environment you want to use
3. Click **Generate API key**
4. Copy the key immediately (it won't be shown again)
5. Use it in your application as `TRACELOOP_API_KEY`
See [Managing API Keys](/settings/managing-api-keys) for detailed instructions.
## Viewing Your Data
### Switching Between Projects
The Traceloop dashboard shows **one project at a time**. To switch projects:
1. Click the project dropdown from the main menu on the left-hand side of the dashboard
2. Select the project you want to view
3. All traces, datasets, and other data will update to show only that project
You cannot view multiple projects simultaneously. This is by design to maintain
clear data isolation and prevent confusion.
### Filtering by Environment
Within a project, you can filter data by environment:
1. Select your project from the dropdown
2. Use the environment filter to show only specific environments
3. This filters traces, monitors, and other real-time data by environment
## Managing Projects and Environments
### Renaming
**Projects**: Can be renamed at any time
* Click on the project → Settings → Rename
**Environments**: Cannot be renamed
* Delete and recreate if needed (see warnings below)
### Deleting Projects
**Deleting a project is permanent and irreversible.**
When you delete a project:
* All traces and spans are permanently deleted
* All datasets and their versions are lost
* All prompts, evaluators, and experiments are removed
* All API keys for that project are revoked
**There is no way to recover this data.**
To delete a project:
1. Open the app settings
2. Find the project you want to delete
3. Click the 3-dot menu
4. Click **Delete project**
5. Confirm the deletion
### Deleting Environments
**Deleting an environment is permanent and irreversible.**
When you delete an environment:
* All traces for that environment are permanently deleted
* The API key is revoked immediately
* Applications using that key will stop sending data
**There is no way to recover this data.**
To delete an environment:
1. Open the app settings
2. Find the environment you want to delete
3. Click the 3-dot menu
4. Click **Delete environment**
5. Confirm the deletion
**Organization-level environments:**
* Cannot delete the three default environments (dev, stg, prd)
* Can delete custom organization-level environments
* Deleting removes the environment from all projects
**Project-specific environments:**
* Can delete any project-specific environment
* Only affects that specific project
### Limitations and Permissions
**Current limitations:**
* ❌ Cannot move or copy data between projects
* ❌ Cannot merge projects
* ❌ Cannot transfer datasets or prompts between projects
* ❌ No per-project access control (everyone in the organization can see all projects)
**What you can do:**
* ✅ Create unlimited projects and environments
* ✅ Rename projects (but not environments)
* ✅ Everyone in your organization can manage all projects and API keys
## Best Practices
### Project Organization
Create one project per application or major service.
**Example:**
* "web-app" (frontend)
* "api-gateway" (backend)
* "auth-service" (microservice)
Create projects based on team ownership.
**Example:**
* "checkout-team"
* "recommendations-team"
* "infrastructure-team"
Separate different products or customer segments.
**Example:**
* "consumer-app"
* "enterprise-app"
* "internal-tools"
For complex deployments with regional separation.
**Example:**
* "app-us-production"
* "app-eu-production"
* "app-asia-production"
### Environment Strategy
**Use built-in environments for standard workflows:**
```
dev → Local development and unit testing
stg → Integration testing and QA
prd → Live customer traffic
```
**Add custom environments for special cases:**
```
qa → Dedicated QA team testing
preview → Preview deployments for each PR
canary → Canary deployments before full rollout
eu-prd → Regional production environments
```
### Naming Conventions
**Projects:**
* Use descriptive, lowercase names with hyphens
* Include the service or application name
* Examples: `payment-api`, `mobile-app`, `ml-inference`
**Environments:**
* Keep names short and clear
* Use standard terms when possible
* Examples: `dev`, `stg`, `prd`, `qa`, `preview`
## Common Scenarios
### Microservices Architecture
Create one project per microservice:
```
Projects:
├── api-gateway (dev, stg, prd environments)
├── auth-service (dev, stg, prd environments)
├── payment-service (dev, stg, prd environments)
└── notification-service (dev, stg, prd environments)
```
Each service has its own API keys per environment, keeping traces completely isolated.
### Monorepo with Multiple Apps
Create projects per deployable application:
```
Projects:
├── web-frontend (dev, stg, prd)
├── mobile-backend (dev, stg, prd)
└── admin-dashboard (dev, stg, prd)
```
### Multi-Region Deployment
Option 1: Use custom environments per region within one project:
```
Project: global-app
Environments:
├── dev
├── stg
├── us-prd
├── eu-prd
└── apac-prd
```
Option 2: Use separate projects per region:
```
Projects:
├── app-us (dev, stg, prd)
├── app-eu (dev, stg, prd)
└── app-apac (dev, stg, prd)
```
## Troubleshooting
### Can't See My Project in Dashboard
**Problem:** Created a project but it doesn't appear in the dropdown.
**Solutions:**
* Refresh the page
* Check if you're logged into the correct organization
* Verify the project wasn't deleted
### Data Appearing in Wrong Project
**Problem:** Traces showing up in unexpected project.
**Solutions:**
* Verify which API key you're using: `echo $TRACELOOP_API_KEY`
* Check which project + environment the API key belongs to
* Ensure you haven't accidentally used the wrong key in your configuration
### Need to Move Data Between Projects
**Problem:** Want to transfer datasets or traces to a different project.
**Solution:**
* Data cannot be moved between projects (this is a security/isolation feature)
* For datasets: Export as CSV and import into the new project
* For traces: Cannot be transferred (must regenerate in new project)
### Accidentally Deleted Environment
**Problem:** Deleted an environment and lost data.
**Solution:**
* Unfortunately, there is no way to recover deleted data
* Prevention: Always confirm before deleting
* Best practice: Back up critical datasets regularly
## Related Resources
Learn how to generate and manage API keys for your projects
Set up your first project and start sending traces
Create datasets within your projects for experiments
Manage prompts within projects and deploy to environments
## Why Projects and Environments?
### The Problem
When you have multiple applications or deployment stages:
* Traces from different services get mixed together
* Production data appears alongside development experiments
* Team members see irrelevant data from other projects
* Testing changes risks affecting production monitoring
### The Solution
**Projects** completely isolate data for different applications:
* Each project has its own traces, datasets, prompts, evaluators, and experiments
* Switch between projects to view specific application data
* Generate separate API keys per project
**Environments** separate deployment stages within a project:
* dev, stg, and prd environments (built-in)
* Custom environments (e.g., "qa", "eu-prd", "preview")
* Each environment has its own API key and data stream
## Understanding Projects
### What is a Project?
A project is a complete isolation boundary for all your Traceloop data. Think of it as a workspace for a specific application or service.
**Each project contains:**
* Traces and spans
* Datasets for experiments
* Prompt configurations
* Evaluators and monitors
* Experiment results
**Common use cases for creating projects:**
* Separate applications (e.g., "web-app", "mobile-app", "api-service")
* Microservices in a distributed system
* Different teams or product areas
* Major feature branches or product lines
### When to Create a New Project
✅ **Create a new project when:**
* Building a new application or service
* Separating data for different teams
* Testing major architectural changes in isolation
* Managing multi-tenant applications (one project per tenant)
❌ **Don't create a new project for:**
* Different deployment stages (use environments instead)
* Temporary experiments (use Development environment)
* A/B tests (use datasets and experiments features)
## Understanding Environments
### What is an Environment?
An environment represents a deployment stage within a project. Each environment has its own API key, allowing you to send traces from different stages without mixing the data.
**Default environments** (cannot be deleted):
* **dev**: Local development and testing
* **stg**: Pre-production testing and validation
* **prd**: Live production traffic
**Custom environments**: Add your own based on your workflow
* Examples: "qa", "uat", "preview", "eu-prd", "us-prd"
### Organization-Level vs. Project-Level Environments
Traceloop supports two types of environments:
**Organization-Level Environments**
* Created at the organization settings level
* Automatically cascade to **all projects** (existing and new)
* Use this for environments that apply across your entire organization
**Project-Specific Environments**
* Created within a single project
* Only appear in that specific project
* Use this for project-specific deployment stages
**Best practice:** Create organization-level environments for company-wide deployment stages
(dev, stg, prd, qa). Create project-specific environments only when needed
for unique deployment scenarios.
### How Environment Cascading Works
When you create an organization-level environment:
1. It immediately appears in all existing projects
2. It automatically appears in any new projects you create
3. Each project can independently generate API keys for that environment
**Example:**
```
Organization creates "QA" environment
↓
Appears in "web-app" project (can generate its own QA API key)
Appears in "api-service" project (can generate its own QA API key)
Appears in "mobile-app" project (can generate its own QA API key)
```
## Setting Up Projects and Environments
Go to **Settings** in your Traceloop dashboard, then select the **Organization** tab.
You'll see two sections:
* **Projects and API keys**: Manage your projects
* **Organization environments**: Manage org-wide environments
If you need a new project:
1. Click the **+** button next to "Projects and API keys"
2. Enter a descriptive name (e.g., "web-app", "payment-service", "mobile-app")
3. Click **Create**
The project is created instantly with all organization-level environments included.
A "Default project" is created automatically when you sign up.
You can rename or delete it if needed.
If you need additional environments beyond dev, stg, and prd:
**For organization-wide environments:**
1. Click the **+** button next to "Organization environments"
2. Enter an environment name (e.g., "qa", "preview", "eu-prd")
3. Click **Create**
4. The environment appears in all projects immediately
**For project-specific environments:**
1. Click on your project
2. Click the **+** button next to "Project environments"
3. Enter an environment name
4. Click **Create**
5. The environment appears only in this project
An environment **slug** is automatically created for SDK usage. For example,
"EU Production" becomes "eu-production" as the slug. The default environments
use "dev", "stg", and "prd" as their slugs.
API keys are generated per project + environment:
1. Click on your project
2. Find the environment you want to use
3. Click **Generate API key**
4. Copy the key immediately (it won't be shown again)
5. Use it in your application as `TRACELOOP_API_KEY`
See [Managing API Keys](/settings/managing-api-keys) for detailed instructions.
## Viewing Your Data
### Switching Between Projects
The Traceloop dashboard shows **one project at a time**. To switch projects:
1. Click the project dropdown from the main menu on the left-hand side of the dashboard
2. Select the project you want to view
3. All traces, datasets, and other data will update to show only that project
You cannot view multiple projects simultaneously. This is by design to maintain
clear data isolation and prevent confusion.
### Filtering by Environment
Within a project, you can filter data by environment:
1. Select your project from the dropdown
2. Use the environment filter to show only specific environments
3. This filters traces, monitors, and other real-time data by environment
## Managing Projects and Environments
### Renaming
**Projects**: Can be renamed at any time
* Click on the project → Settings → Rename
**Environments**: Cannot be renamed
* Delete and recreate if needed (see warnings below)
### Deleting Projects
**Deleting a project is permanent and irreversible.**
When you delete a project:
* All traces and spans are permanently deleted
* All datasets and their versions are lost
* All prompts, evaluators, and experiments are removed
* All API keys for that project are revoked
**There is no way to recover this data.**
To delete a project:
1. Open the app settings
2. Find the project you want to delete
3. Click the 3-dot menu
4. Click **Delete project**
5. Confirm the deletion
### Deleting Environments
**Deleting an environment is permanent and irreversible.**
When you delete an environment:
* All traces for that environment are permanently deleted
* The API key is revoked immediately
* Applications using that key will stop sending data
**There is no way to recover this data.**
To delete an environment:
1. Open the app settings
2. Find the environment you want to delete
3. Click the 3-dot menu
4. Click **Delete environment**
5. Confirm the deletion
**Organization-level environments:**
* Cannot delete the three default environments (dev, stg, prd)
* Can delete custom organization-level environments
* Deleting removes the environment from all projects
**Project-specific environments:**
* Can delete any project-specific environment
* Only affects that specific project
### Limitations and Permissions
**Current limitations:**
* ❌ Cannot move or copy data between projects
* ❌ Cannot merge projects
* ❌ Cannot transfer datasets or prompts between projects
* ❌ No per-project access control (everyone in the organization can see all projects)
**What you can do:**
* ✅ Create unlimited projects and environments
* ✅ Rename projects (but not environments)
* ✅ Everyone in your organization can manage all projects and API keys
## Best Practices
### Project Organization
Create one project per application or major service.
**Example:**
* "web-app" (frontend)
* "api-gateway" (backend)
* "auth-service" (microservice)
Create projects based on team ownership.
**Example:**
* "checkout-team"
* "recommendations-team"
* "infrastructure-team"
Separate different products or customer segments.
**Example:**
* "consumer-app"
* "enterprise-app"
* "internal-tools"
For complex deployments with regional separation.
**Example:**
* "app-us-production"
* "app-eu-production"
* "app-asia-production"
### Environment Strategy
**Use built-in environments for standard workflows:**
```
dev → Local development and unit testing
stg → Integration testing and QA
prd → Live customer traffic
```
**Add custom environments for special cases:**
```
qa → Dedicated QA team testing
preview → Preview deployments for each PR
canary → Canary deployments before full rollout
eu-prd → Regional production environments
```
### Naming Conventions
**Projects:**
* Use descriptive, lowercase names with hyphens
* Include the service or application name
* Examples: `payment-api`, `mobile-app`, `ml-inference`
**Environments:**
* Keep names short and clear
* Use standard terms when possible
* Examples: `dev`, `stg`, `prd`, `qa`, `preview`
## Common Scenarios
### Microservices Architecture
Create one project per microservice:
```
Projects:
├── api-gateway (dev, stg, prd environments)
├── auth-service (dev, stg, prd environments)
├── payment-service (dev, stg, prd environments)
└── notification-service (dev, stg, prd environments)
```
Each service has its own API keys per environment, keeping traces completely isolated.
### Monorepo with Multiple Apps
Create projects per deployable application:
```
Projects:
├── web-frontend (dev, stg, prd)
├── mobile-backend (dev, stg, prd)
└── admin-dashboard (dev, stg, prd)
```
### Multi-Region Deployment
Option 1: Use custom environments per region within one project:
```
Project: global-app
Environments:
├── dev
├── stg
├── us-prd
├── eu-prd
└── apac-prd
```
Option 2: Use separate projects per region:
```
Projects:
├── app-us (dev, stg, prd)
├── app-eu (dev, stg, prd)
└── app-apac (dev, stg, prd)
```
## Troubleshooting
### Can't See My Project in Dashboard
**Problem:** Created a project but it doesn't appear in the dropdown.
**Solutions:**
* Refresh the page
* Check if you're logged into the correct organization
* Verify the project wasn't deleted
### Data Appearing in Wrong Project
**Problem:** Traces showing up in unexpected project.
**Solutions:**
* Verify which API key you're using: `echo $TRACELOOP_API_KEY`
* Check which project + environment the API key belongs to
* Ensure you haven't accidentally used the wrong key in your configuration
### Need to Move Data Between Projects
**Problem:** Want to transfer datasets or traces to a different project.
**Solution:**
* Data cannot be moved between projects (this is a security/isolation feature)
* For datasets: Export as CSV and import into the new project
* For traces: Cannot be transferred (must regenerate in new project)
### Accidentally Deleted Environment
**Problem:** Deleted an environment and lost data.
**Solution:**
* Unfortunately, there is no way to recover deleted data
* Prevention: Always confirm before deleting
* Best practice: Back up critical datasets regularly
## Related Resources
Learn how to generate and manage API keys for your projects
Set up your first project and start sending traces
Create datasets within your projects for experiments
Manage prompts within projects and deploy to environments